
September Clearance Sale!
September Clearance Sale
To celebrate the start of Autumn, we wanted to give our customers some great deals and discounts to get stuck in on some autumnal garden projects.
With over 50% on products such as Porcelain Paving, Paving Grout, Artificial Grass and more - you won't find prices like these anywhere else!
Visit our 'SALE ITEMS' page to browse through all our discounted products and place your orders now!
Read through our article to get an idea what products to expect.
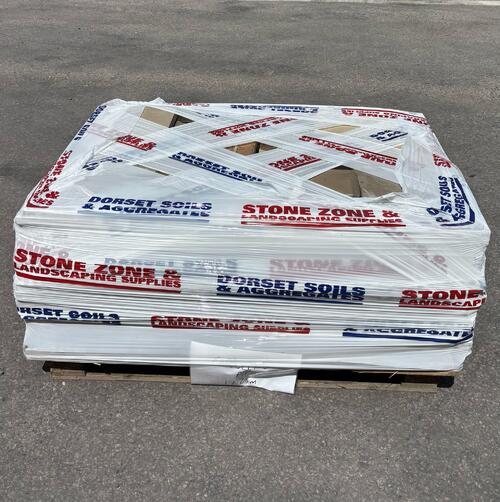
Discounted Porcelain Paving
You will be hard-pressed to find Porcelain discounts quite like this. We have a wide range of discounted Porcelain packs, wrapped and ready for delivery.
Ranging from Grey paving slabs (eg. 'Natural' Kandla Grey Porcelain Paving) to Beige garden tiles (eg.'Natural' Rainbow Porcelain Paving) , you are sure to find a pack that is perfect for you. These paving packs are perfect for your garden patio or front garden by your driveway. Our slabs can also be used as stepping stones or as pool copings if you wanted add more flare to your outdoor space.
For some more information on how to lay these slabs, read our Laying Guide HERE.
Don't forget to keep your eyes peeled for further discounted paving that we will be adding very soon.

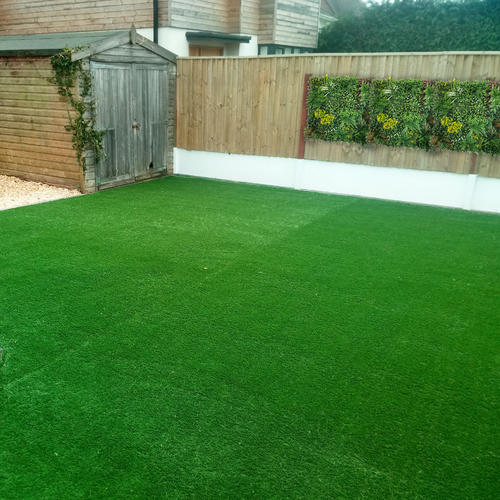
Discounted Artificial Grass
If you are on the hunt for some Artificial Grass for a small area or need some supplementary pieces, then this is the perfect time to place your order. We currently have a huge discount on a roll of Goliath Artificial Grass, perfect for front and back gardens.
With over 40% off this Goliath roll, you are getting an unbelievable bargain. Artificial grasses are perfect for those with busy schedules or anyone who wants to have a fresh-looking green lawn all year round!
Make sure to check our SALE ITEMS page daily, as we are adding new products constantly.
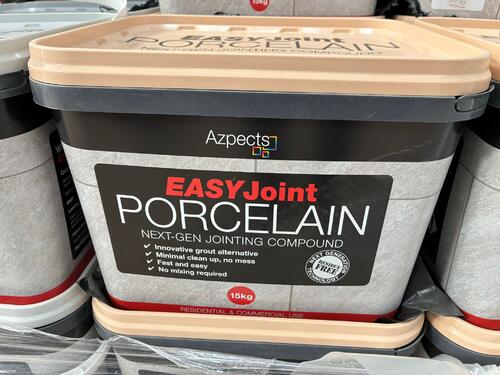
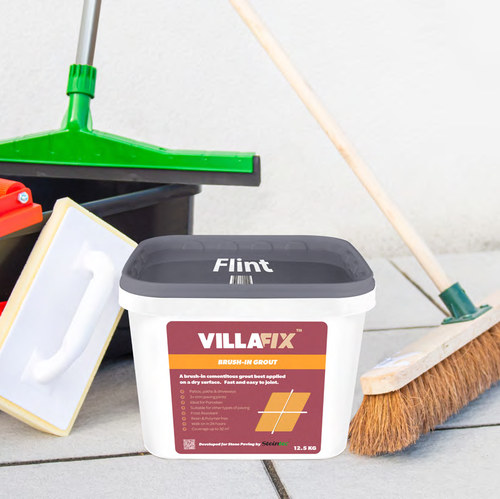
Discounted Paving Grout
Perfect for landscapers, we are offering a significant discount on several ranges of Paving Grout, perfect for gardening and landscaping projects. You will find VillaFix, Joint-It and EasyJoint paving grouts on discount. You can either purchase them as individual tubs or in packs of 10.
Ideal for professional landscapers, or landscaping enthusiasts, our heavily discounted Paving Grout is perfect for current projects and for ones in the future. Be prepared for all the Autumn and Winter projects by having a good stock of paving Grout on hand.
The VillaFix Grout is applicable on both Porcelain and Stone Paving. At the moment, you can purchase these in 2 colours, Slate Grey and Cappuccino. Just as well, both Grey and Cream shades are the most popular colours for paving tiles and has been for the past few years.
The Joint-It Mortar has been designed especially for Porcelain Paving. We have 2 sizes available of the Joint-it jointing: 12.5KG and 20KG. In the 12.5KG Tubs the colours that are available are Black, Grey and Dark Grey; for the 20KG Tubs we have available in Black.
Finally, the EasyJoint Porcelain, as explained in the name, is jointing compound for Porcelain tiles. With 20% off both the White Gold and Silver Jointing, it's your best chance to stock up on these landscaping essentials.
As we have previously mentioned, if you are on the hunt for different and varied colours of jointing, make sure to visit our SALE ITEMS page regularly, as it is updated constantly.
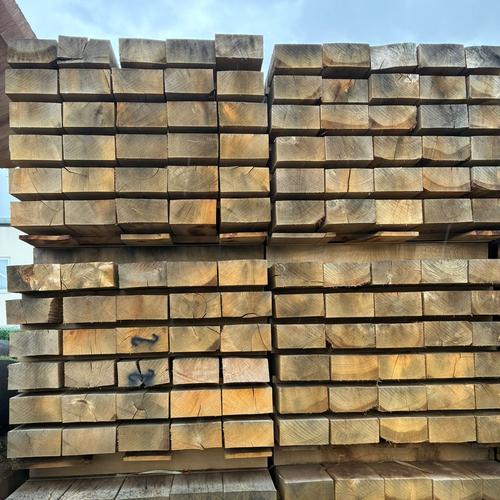
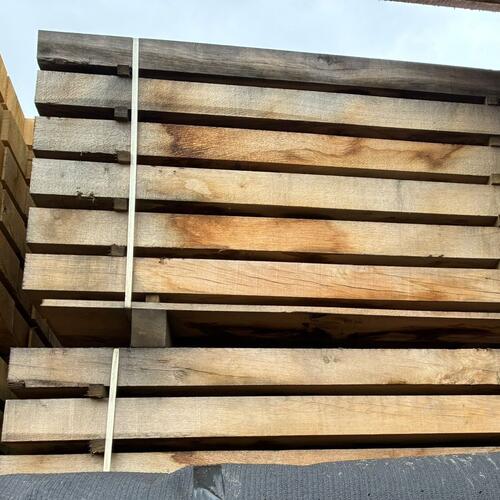
Discounted Oak Sleepers, 2.4m x 200mm x 100mm
Looking for affordable railway sleepers? Don’t miss this great offer! Grab Landscape Grade Oak Sleepers made from FSC-certified timber for a sustainable, high-quality choice.
Available in either packs of 10 or 20 (the more you buy the cheaper it is!), these Oak Sleepers are excellent for garden edges, raised plant beds, DIY garden ponds and more! Slightly silvered due to the weather, these Oak Sleepers will allow your garden to look more structured and streamlined.
For more ideas read our article '5 Great Ways to Use Wooden Sleepers', HERE.
How to buy Stone Zone Sale items
- Find the discounted product you’d like, and ensure there is enough for your project (some clearance Paving is one-off stock with one pack available)
- Add to your basket and select either free store collection or fast, home delivery (charges may apply – enter your postcode for accurate costs)
- Enjoy your bargain items and bear in mind sale items are non-returnable and sold as seen

How to Install Porcelain Paving Tiles
Installing outdoor porcelain paving requires careful planning and attention to detail to achieve a durable and visually appealing finish. Follow this step-by-step guide for a professional result:
1. Plan and Design
Measure the Area: Accurately measure your space, taking into account any patterns, borders, or special features you want to include.
Choose Your Pavers: Select porcelain pavers that meet both your aesthetic and functional requirements, considering colour, size, thickness, and finish.
2. Prepare the Site
Mark the Layout: Use stakes and string to outline your design, ensuring straight lines and precise corners.
Excavate the Ground: Dig down 150–200mm (6–8 inches) to accommodate the sub-base, bedding layer, and pavers. Ensure a slight slope away from buildings for proper drainage.
3. Create a Stable Sub-Base
Lay the Sub-Base: Spread 100–150mm (4–6 inches) of MOT Type 1 crushed stone or hardcore evenly across the area.
Compact the Sub-Base: Use a plate compactor to create a firm, level foundation that minimises movement over time.
4. Prepare the Bedding Layer
Mix Mortar: Prepare a semi-dry mortar using a 4:1 ratio of sharp sand to cement.
Apply Mortar: Spread the mortar evenly over the compacted sub-base to a depth of approximately 30mm (1–1.5 inches), maintaining the same slope for drainage.
5. Prime the Porcelain Pavers
Apply Slurry Primer: Coat the back of each paver with a slurry primer (e.g., UltraScape Premprime Paving Slurry Primer) to ensure strong adhesion to the mortar bed.
6. Lay the Porcelain Pavers
Position the Pavers: Start from one corner, pressing each paver firmly into the mortar.
Use Spacers: Maintain a 3–5mm gap between pavers to allow for jointing material.
Level Each Paver: Check alignment with a spirit level and make any necessary adjustments using a rubber mallet.
7. Cutting Pavers (if required)
Cut with Precision: Use a wet tile saw with a diamond blade for clean, accurate cuts. Always wear safety goggles and gloves during cutting.
8. Jointing the Paving
Fill the Joints: Once the mortar has set (usually after 24 hours), fill gaps with a jointing compound such as EASYJoint, following the manufacturer’s instructions.
Activate the Compound: If required, add water to fully secure the joints.
9. Final Finishing
Clean the Surface: Use a soft brush and water to remove any excess jointing compound from the pavers.
Allow to Set: Let the paving cure for 24–48 hours before walking on it or placing heavy furniture.
10. Optional: Sealing
While porcelain is naturally non-porous, sealing the joints can provide extra protection against stains. Ensure the jointing compound is fully cured before applying a sealant.
11. Maintenance Tips
Routine Cleaning: Sweep regularly and rinse occasionally with a hose or pressure washer to keep the surface fresh.
Avoid Harsh Chemicals: Stick to mild detergents and avoid abrasive cleaners to preserve the integrity and appearance of the pavers and joints.
By following these steps, your porcelain paving will not only look stunning but also remain durable and low-maintenance for years to come.
How to Care for Artificial Grass
Artificial Grass Maintenance: Keep Your Turf Looking Pristine
Artificial grass is low-maintenance compared to natural lawns, but a little care goes a long way in keeping it clean, vibrant, and long-lasting. Follow these simple tips to maintain a perfect-looking lawn.
1. Regular Brushing for a Lush Appearance
✔ Use a stiff-bristled brush or artificial grass rake to prevent matting and keep fibres upright.
✔ Brush against the grain to maintain a full, natural look.
✔ Helps remove debris like leaves, twigs, and pet hair while redistributing infill evenly.
2. Rinse & Spot Clean for Freshness
✔ Lightly rinse with water to clear dust, dirt, and pollen.
✔ For stains or spills, use a mild detergent solution—avoid harsh chemicals that could damage fibres.
✔ Rinse thoroughly after cleaning to remove any residue.
3. Keep Weeds at Bay
✔ Although artificial grass is largely weed-resistant, occasional weeds may appear along the edges.
✔ Remove them manually and consider a weed barrier fabric or safe weed killer along the perimeter.
4. Pet Waste Management
✔ Remove solid waste promptly and rinse affected areas to prevent odours and bacteria buildup.
✔ For urine, dilute with water and rinse thoroughly to reduce discolouration.
✔ Use pet-friendly turf cleaners or deodorizers for lasting freshness.
5. Prevent Damage & Protect Your Turf
✔ Avoid leaving heavy objects in one spot for long periods to prevent flattening.
✔ Keep sharp or abrasive tools away to avoid tears or punctures.
✔ No vehicles, bicycles, or heavy equipment on the grass—these can compact fibres or cause damage.
6. Routine Inspections & Upkeep
✔ Check for loose seams, uneven patches, or worn fibres and address issues promptly.
✔ Consider professional maintenance once a year for long-term durability and performance.
How to Apply Paving Grout to Tiles
Before You Start
Lay down dust sheets to protect your flooring, bathroom suite, and furniture.
Choose the right grout for your project. Options vary for dry or wet areas, anti-mould properties, and colours. Check out our range to find the best fit for your tiles.
Equipment Needed:
- Grout (powdered or ready mix)
- Bucket
- Grout float or spreader
- Tile sponge
- Grout finisher
- Cleaning cloth
1. Mix the Grout
- If using powdered grout, mix with water in a bucket to create a smooth, creamy paste.
- Avoid over-mixing to prevent air bubbles.
- Only mix enough for 30 minutes of use, as grout begins to dry after this time.
- Follow the manufacturer’s instructions for your chosen grout.
2. Work Grout into the Joints
- Use a grout float for larger areas or a grout spreader for small areas like splashbacks.
- Apply the grout diagonally across the joints to push it fully in.
- Scrape off excess grout from the tile surface as you work.
- Continue until all joints are filled. Work steadily—grout begins to harden in 20–30 minutes.
- Consider grouting one wall at a time.
3. Clean Excess Grout with a Tile Sponge
- Use a damp (not soaking) sponge to wipe away grout residue from the tile surface.
- Be careful not to remove grout from the joints.
- If grout is pulled from the joints, reapply with a grout spreader or your finger.
4. Smooth the Joints with a Grout Finisher
- Wait 20–30 minutes for the grout to firm up.
- Run the rounded end of the grout finisher along each joint in a continuous motion for a smooth, even finish.
5. Remove Powdery Film
- Once the grout has dried for a few hours, a fine powdery film may remain on the tiles.
- Wipe clean with a soft, dry cloth to reveal a polished, finished surface.
Oak Sleepers for Garden Edging
Many gardeners use borders to add colour, define spaces, or separate different landscaping features, and Oak Sleepers are a stylish, versatile choice for this purpose.
Used as ground-level flower borders, their rich oak tones enhance your garden’s appearance and beautifully complement the colours of flowers, shrubs, or plants. They can also be combined with Wessex Soils or Woodland Mulch to create decorative, natural-looking features.
Oak Sleepers are ideal for multi-level gardens or simply for creating clear divisions between hard landscaping elements. They pair beautifully with artificial grass, porcelain or sandstone paving, and areas filled with chippings or decorative stones.
They also make excellent edging for outdoor paths. When paired with path chippings, the oak’s natural tones create a subtle, cohesive look that blends seamlessly with the surrounding landscape.
Please Note: These Oak Sleepers are classed as ‘Landscaping Grade.’ While they feature at least two smooth, high-quality sides, some edges may be rough or slightly frayed—perfect for garden applications where not all sides are visible.
(Sale items are not in conjunction with any other discounts)