Sienna™ Quartz Black Porcelain Paving
Sienna™ Paving is our exclusive range of premium porcelain paving, offering high-end style at an affordable price.
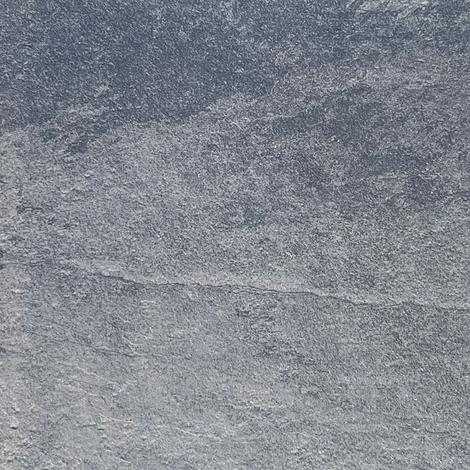
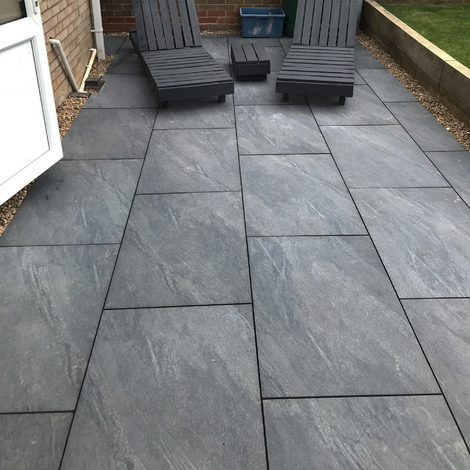
One standout from the collection is Sienna™ Quartz Black Porcelain—a refined choice that brings a touch of elegance to any garden or driveway. With its deep, dark grey tones and subtle silver markings, Quartz Black creates a contemporary and luxurious atmosphere, living up to its name.
Blending the sleek look of contemporary design with the natural textures of classic stone, Sienna™ Porcelain Paving delivers timeless beauty to outdoor spaces. Its clean, modern aesthetic makes it a versatile option for enhancing any landscape.
More than just stylish, Sienna™ Porcelain is built to last. It’s frost-resistant, highly durable, and features an R11 slip-resistance rating, making it safe and reliable—even in wet conditions. The smooth, non-porous surface is especially ideal for poolside areas or family-friendly gardens, combining safety with sophistication.
How to Purchase Sienna™ Quartz Black Porcelain
900 x 600 sqm in 5.4 sqm Packs
Also available to pick up from our depots in Ferndown, Bournemouth, and Dorchester.
Visit the Christchurch Showroom if you want to see our Sienna™ range on display.
Sienna™ Quartz Black Paving for Your Garden
Sienna™ Quartz Black Porcelain Paving features dark grey and charcoal tones with a modern, refined finish—perfect for those who appreciate a minimalist style with an elegant edge.
Versatile and stylish, Sienna™ Paving isn’t just for outdoor use. Its sleek design and easy installation make it an excellent choice for indoor spaces as well, including kitchens and bathrooms, where it adds a clean, contemporary touch to any interior.
What is the Difference Between Porcelain and Sandstone?
Porcelain and Sandstone Paving each offer unique advantages, catering to different design preferences and functional needs in outdoor landscaping.
Porcelain Paving
Porcelain is a man-made material engineered to mimic the beauty of natural stone while delivering superior performance. Manufactured through a process called vitrification, these tiles are made from premium clays and minerals, including quartz, and fired at extremely high temperatures (around 1200°C). The result is a dense, non-porous surface that’s waterproof, frost-resistant, and highly durable—often likened to a "glass-like" finish.
With an R11 slip resistance rating, porcelain is an ideal choice for areas prone to moisture, such as pool surrounds or family spaces. It resists stains, mold, and moss, and requires minimal upkeep to maintain its vibrant appearance.
Sandstone Paving
Sandstone, on the other hand, is a natural stone quarried primarily in India. Its organic texture and varied color palette make it a popular choice for traditional and rustic landscapes. As a porous material, sandstone allows water to permeate through, which can contribute to improved rainwater drainage and reduced surface runoff—an environmentally friendly feature.
Unlike porcelain, sandstone requires regular sealing to protect its surface and retain its color. Over time, the hues may naturally fade, developing a weathered patina that adds timeless character and charm.
Key Differences at a Glance:
Durability: Porcelain is harder and more resistant to wear and weather.
Maintenance: Porcelain is low-maintenance; sandstone needs sealing and care.
Aesthetics: Porcelain offers sleek, modern finishes; sandstone provides natural variation and a more traditional look.
Environmental Impact: Sandstone’s permeability supports natural drainage.
Slip Resistance: Porcelain (R11 rated) is ideal for wet areas.
Final Thoughts
If you're looking for a sleek, durable, and low-maintenance option, porcelain is likely the better fit. If you prefer a more natural, traditional look with eco-friendly benefits, sandstone could be your ideal choice. Either way, both bring lasting beauty and value to any outdoor space.
How to Install Sienna™ Quartz Black Tiles
Installing outdoor porcelain paving requires precision, proper preparation, and attention to detail to ensure a long-lasting and visually appealing finish. Follow this comprehensive guide for a successful installation:
1. Planning and Design
Measure Your Space: Begin by measuring the area, including any design elements such as borders or specific patterns.
Choose the Right Pavers: Select porcelain tiles that meet both your aesthetic preferences and functional requirements, considering size, thickness, and color.
2. Site Preparation
Mark the Layout: Use string lines and stakes to outline your paving area. Ensure all corners are square and lines are straight.
Excavate the Ground: Dig down 150–200mm (6–8 inches) to make room for the sub-base, mortar bed, and paving. Maintain a gentle slope away from buildings to promote drainage.
3. Laying the Sub-Base
Add MOT Type 1: Spread 100–150mm (4–6 inches) of MOT Type 1 hardcore or crushed stone over the excavated area.
Compact Thoroughly: Use a plate compactor to level and firm the base, creating a stable foundation.
4. Preparing the Mortar Bed
Mix Mortar: Combine sharp sand and cement in a 4:1 ratio to create a semi-dry mix.
Apply Mortar Layer: Spread a 30mm (1–1.5 inches) layer evenly over the sub-base, ensuring it follows your planned slope for proper water runoff.
5. Priming the Pavers
Use a Slurry Primer: Before laying, coat the back of each paver with a slurry primer (e.g., Azpects EASYPrime). This enhances the bond between the porcelain and the mortar bed.
6. Laying the Porcelain Paving
Start in a Corner: Lay your first paver in a corner and work your way across the area.
Use Spacers: Maintain 3–5mm gaps between each tile to allow for jointing.
Level as You Go: Tap pavers into place with a rubber mallet and check for level using a spirit level.
7. Cutting the Pavers
Cut with Care: Use a wet tile saw with a diamond blade for clean, accurate cuts. Always wear protective eyewear and gloves when cutting.
8. Jointing the Paving
Let Mortar Set: Allow the mortar to cure for at least 24 hours before filling the joints.
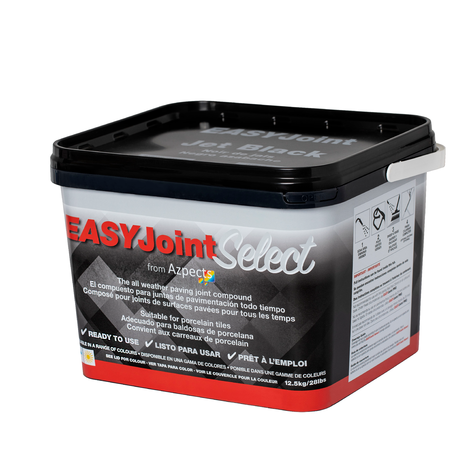
Apply Jointing Compound: Use a product like EASYJoint, following the manufacturer's instructions.
Activate with Water: If needed, spray water to activate the compound and fully secure the joints.
9. Final Touches
Clean Up: Use a soft brush and clean water to remove excess jointing material from the paver surface.
Allow to Cure: Let the paving set for 24–48 hours before walking on it or placing furniture.
10. Optional – Sealing the Joints
Protect Against Stains: While porcelain doesn’t require sealing, sealing the joints can help prevent staining and enhance durability. Only apply sealant after the jointing compound is fully cured.
Ongoing Maintenance Tips
Regular Cleaning: Sweep routinely and rinse occasionally with a hose or light pressure washer.
Avoid Harsh Chemicals: Stick to gentle cleaning products to maintain the paving’s finish and prevent joint degradation.
Buy With Confidence
- Our paving can be purchased in quantities of 5 square metres.
- Please enter the amount of 5 sqm you need (for example 20sqm would be 4 x 5sqm).
- All of our paving comes in crates which can be easily placed into a van or into a garden using a hiab lorry.
- You can choose a free collection from one of our Depots or fuss-free, home delivery.
A Service You Can Rely On
- Our trustworthy service offers prompt delivery to any area in the UK
- Stone Zone is a family-run business that has been well-established since 1998
- Our knowledgeable customer advisors can help you with your purchase
- We pride ourselves on offering a range of affordable garden supplies
Sample slabs are available in-store, please ask a customer advisor.
Delivery information
Related Blog Article
2025 Garden Trends
Get your garden ‘on trend’ this year with these inspirational ideas! Fr …


