
How to Lay Paving Slabs

If you are designing your garden from scratch or want to rejuvenate your current outdoor area, a patio is the best way to do so. A patio allowed you to have an area in your garden to host parties, entertain guests, have an al-fresco meal and more, rather than just being holed up indoors you can easily have an area to enjoy good weather and get some fresh air. Stone Zone are proud supplier of an ever-growing range of Paving ranging from Sandstone, Limestone, Porcelain and more. Depending on whether you want to create a traditional look or a more modern one, we guarantee that we have the right paving for you. Our vast collection boasts a wide range of colours, designs and materials meaning no matter how big or small your garden, we have products that will cater to your design.
To help you along your refurbishment journey and to provide you with more information about our paving, we have created a handy guide to give you a good idea of how paving is installed. There are several different ways paving can be laid, and we think the best option is to let professionals handle it, however, if you have DIY experience and want to take on a big project for the Spring, you will feel a huge sense of accomplishment once your garden is complete.
Tools and Materials you’ll need:
- Garden Spade
- Tape Measure
- Angle Measure
- String or Spray Paint
- Spirit Level
- Rake
- Wacker Plate
- Rubber Mallet
- Watering Can
- Plastic Sheet (optional)
- Trowel
- Spacers
- Kneeling pad (optional)
- Correct amount of paving slabs
- MOT Type 1 or Hardcore
- Washed Grit (sharp sand)/ Cement
- Heavy Duty Gloves
- Dust Mask
- Safety Goggles
- Ear Defenders
- Steel Toed Boots

1) Create a Design Blueprint
Before you can start installing anything, the first thing you need to do is to create a thorough plan and blueprint so you know the exact positioning of where everything will be placed and that you're satisfied with the plan. Some things to think about are whether you want the patio area to be in a sunny spot or in a more shaded place; the overall shape of the patio; what you want the edges to look like. With all of these factors into consideration you will be able to get an accurate overview of what your patio will potentially look like.
After the blueprint has been created and you know where everything will be placed, go around your garden and roughly create an outline of your patio area. Do not skip this step as it is very important, particularly if you are planning to lay out our best-selling patio packs, which contain 4 different sizes. The best method for laying this type of paving slabs is to avoid ‘cross roads’ within the paving, you have to make sure that the joints are perpendicular to each other. Once you’ve roughly laid this out and have a good overview, take a photo which you can later refer to.

2) Preparation is key
Clearly and carefully mark the area where you have decided you want the paving to be installed. This can be done with spray paint or string. You can use an angle measure to ensure lines are as straight as possible and make sure you’ve marked out the right angles. You can now start digging within the marked area and ensure that you dig deep enough to reach the depth of 100mm of sub-base, 25mm of sharp sand/ cement and the depth of your chosen paving slab. Using a spirit level, ensure the ground is as level as possible.
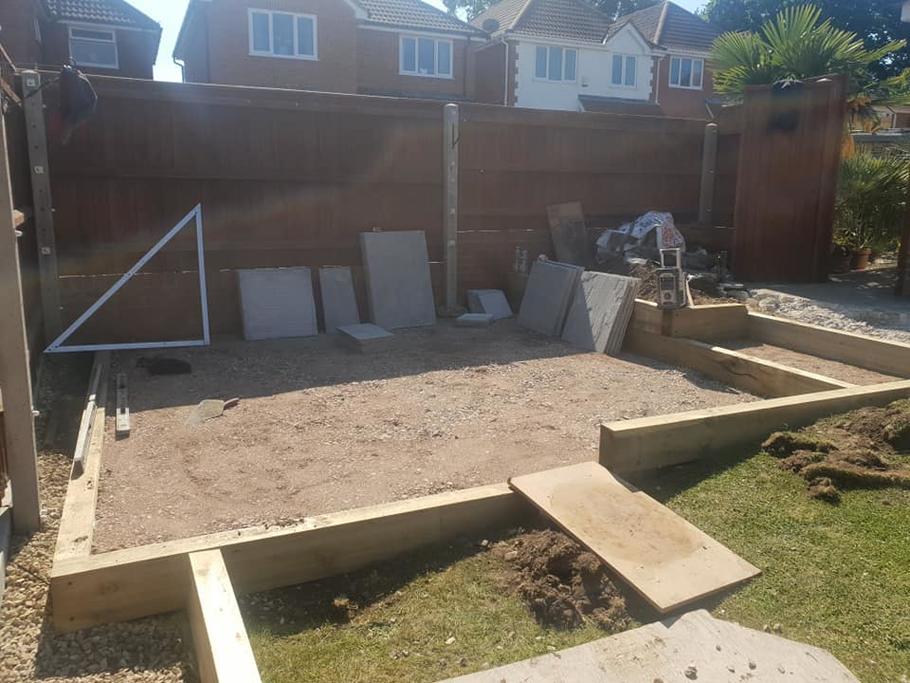
3) Add your Hardcore
Into the area you have dug out, add MOT Type 1 limestone at a depth of 50mm and rake until it is roughly level. Compact the hardcore with a Wacker Plate - which we recommend you hire rather than purchase one. Add a further 50mm of sub-base and compact this layer as well. Compacting twice is the best practice because it will ensure a durable and long-lasting base for your paving.

4) Add Sharp Sand/ Cement
Once that is done, go ahead and add a 25mm layer of a full mortar bed on top of the hardcore base using either washed grit and cement or sand and cement. This is a required step so do not skip out otherwise your paving will not be sturdy and secure. Use a watering can to water over the sand to slightly wet the surface until it is fairly moist and then rake over again.

5) Lay your Paving!
If you have made sure to carefully follow the steps above, you have successfully developed a sturdy paving base that is ready for paving to be installed. As we have stated before, try your best to lay the paving slabs at a 1/60 angle. We highly recommend you do this because it facilitates better drainage during heavy rain. Also, keep in mind that it's important to wear heavy-duty safety gloves when completing this part of the project.
Dampen the underside of the slab with a slurry or a compound on the back of the slabs before laying it onto the sand/ cement. Place your first paving slab at the highest point of the patio, working from one corner to another. The careful and accurate placing of the first slab is crucial, so take your time to make extra certain that the level and angle are correct (with a slight downward angle).
Gently tamp down on the slab with the rubber mallet a few times to firmly place the slab.
REMEMBER: You must leave at least a 3 - 6mm gap between each slab for Porcelain Paving and a 10 -12mm gap for Sandstone and Limestone Paving to allow for the jointing in between. Also, keep in mind that you should seal the back of sawn products to avoid mirroring.
Following the steps above, keep laying the slabs, following the original blueprint you created before. Use the spacers to ensure even gaps throughout the paving. Continually check the level of your paving as you go, remembering the slight downward angle.
Allow the Sharp Sand/ Cement to dry. It is important that it dries slowly, if rain is forecasted, use a large plastic sheet to protect it.

OPTIONAL: If, at any point during this project, you are required to cut down or shape your paving slabs, we supply Rubi Tile Cutters for Sandstone and Porcelain Paving. Although, we understand that this may not be something you want to spend your money on as it will not be used often, so to avoid the purchase, a good option is to ask a trained professional to cut them for you.

6) Joint your Paving
Once the sand/ cement has dried, you can start jointing your slabs together. We sell Porcelain Paving Grout, EasyJoint or Joint-It Grout for natural stone. You can make your own mortar mix with materials we sell; it’s simply 4-part sand to 1 part cement.
Depending on your paving, follow the relevant set of instructions; EasyJoint and Joint-It need very wet conditions, where there would ideally be two people working together; one person spraying the patio with a hose and the other filling in the joints. Porcelain, on the other hand, can be completed by one person. Gently brush away any leftover grout or sand to allow the joints to dry properly. Finish off with a pointing tool to ensure a perfectly smooth finish.

7) Stand back and admire your work!
Installing a patio is not an easy project to undertake, but if you have DIY experience and have completed garden projects before and want to gain further experience, then you will feel very accomplished after finishing your patio installation. We strongly recommend that you leave your patio alone for 24 hours for the jointing grout to set properly, and once that time has passed you will be able to walk around your patio safely and finally enjoy the fruits of your labour!
If you need any further advice, please call 01202 874207 where one of our advisors can help.