
How to Make a Pallet Herb Planter
![]()
If you’ve ever had a delivery arrive on a wooden pallet, chances are it’s still sitting in your garden or garage—unused and taking up space. Wondering what to do with it?
We’ve teamed up with the creative minds behind Instagram’s @Plot33E to bring you the perfect solution! With the growing popularity of upcycling and homegrown produce, now’s the ideal time to transform that spare pallet into a DIY Herb Planter.
Check out our step-by-step guide and give your garden (and that forgotten pallet) a fresh new purpose.
What You'll Need
- 1 Pallet
- Spare Wood (ideally a spare pallet)
- 20kg bag of Quality Soil
- 18 x Galvanised Nails (approx. 1 inch)
- Weed Membrane
- Stapler
- Hand Saw
- Hammer
- Herbs/Flowers
- Trowel
- Strong Scissors
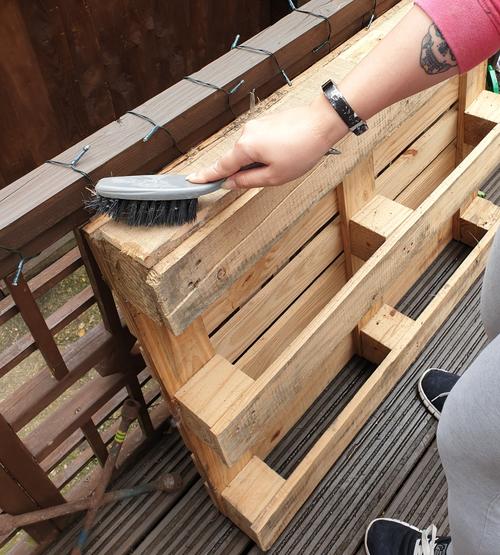
Step 1 - Prep your Pallet
Start by giving your pallet a good brush down to remove any dirt or loose debris. If needed, sand it lightly to smooth out rough edges or markings.
Next, decide which way you'd like the pallet to stand—upright or laid flat—and choose the perfect sunny spot in your garden. Plenty of sunlight is key for happy, thriving herbs!
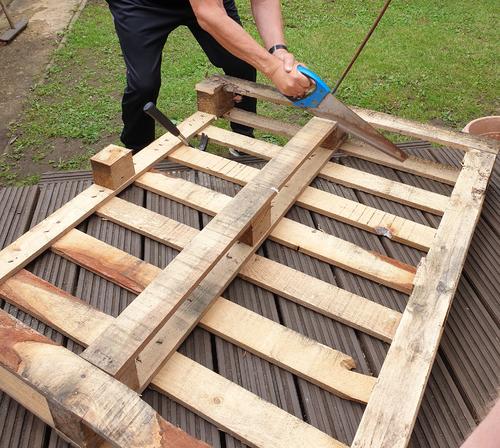
Step 2 - Measure Up
Measure the gaps on the underside of the pallet where your herbs will be planted. In this example, the gap is 10cm wide. To create a snug, seamless finish, your spare wood should match this width exactly—no gaps.
Next, measure the full width of the pallet and cut your wood pieces to fit. These will act as the base for each planting pocket, so precision is key.
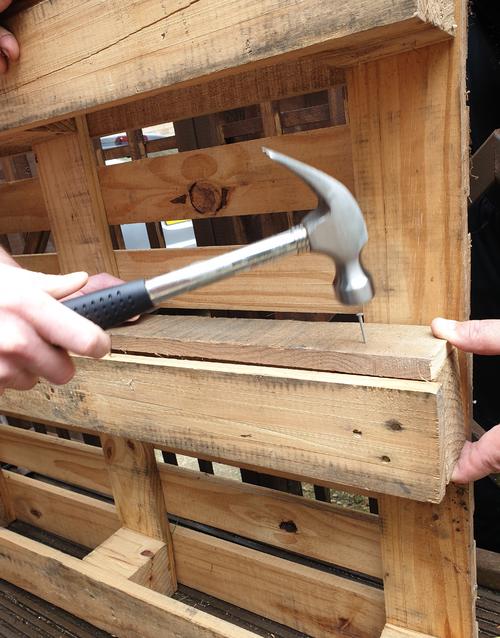
Step 3 - Nail It
Flip the pallet upside down to make it easier to work with. Position your cut wood pieces into the planting gaps, then begin securing them with nails.
Carefully hammer the nails in, making sure each base panel is firmly attached to all three supporting sections of the pallet. In this example, six nails were used per section to ensure a strong, stable fit.
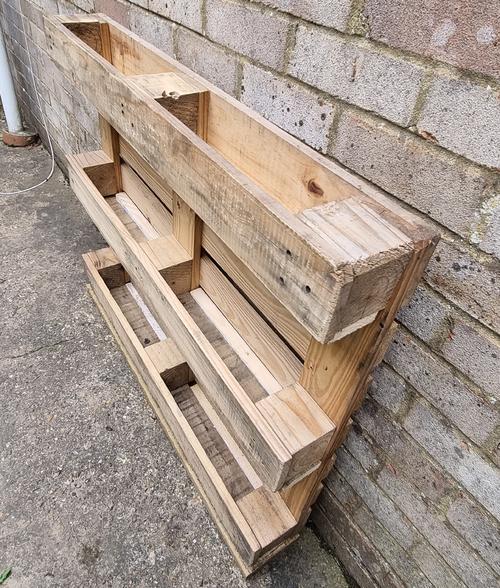
Step 4 - Check It
Once all three wooden base pieces are securely nailed in place, flip the pallet back over. Check the stability of your herb planter and make sure there are no visible gaps between the boards. Everything should feel solid and ready for planting.

Step 5 - Staple It
Measure your weed membrane against each planting gap and cut it roughly to size—this will make it easier to handle. Hold the fabric tightly against the inner sides of the pallet and staple it in place, keeping it as taut as possible. This part can be fiddly, so have extra staples on hand. Once all sections are stapled securely, trim any excess fabric for a neat finish. For added hold, consider hammering in a couple of nails per compartment.
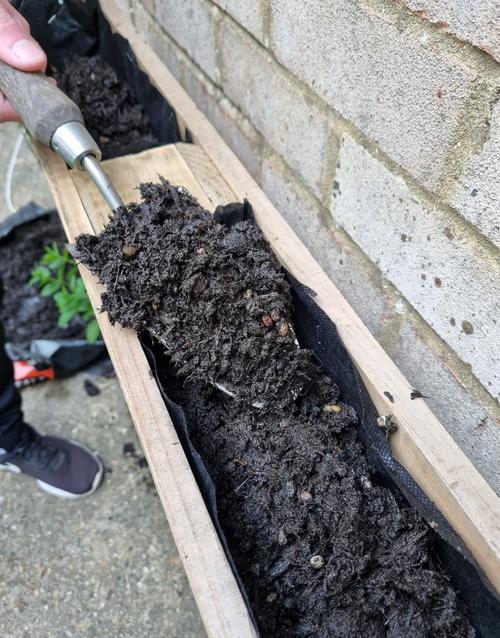
Step 6 - Add Soil
You're now ready to add soil to your herb planter! Using a small trowel, begin by half-filling each compartment with soil. If the soil feels dry, give it a light watering to create the ideal environment for planting your herbs.
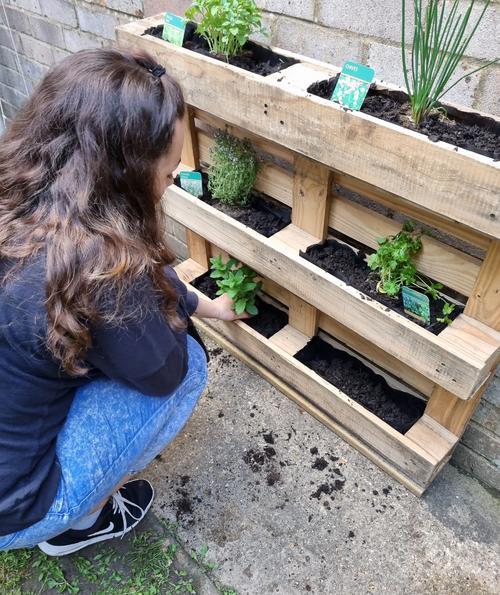
Step 7 - Get Planting!
Now for the most rewarding step—planting your herbs! Before placing each one, check their sunlight preferences. Herbs that thrive in full sun should be planted near the top of the pallet, while those that prefer partial shade are best positioned lower down. Once planted, top up each compartment with a bit of extra soil to help your herbs settle in and establish strong roots.
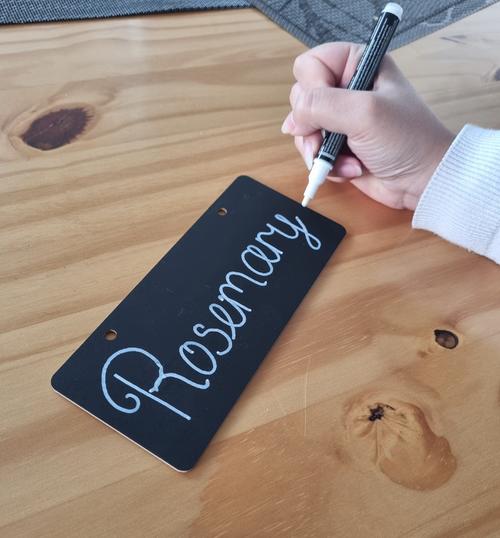
Step 8 - Get Labelling
Don’t forget to label your herbs—it’s a practical touch that also adds charm to your planter! In this example, small chalkboards and a liquid chalk pen from Amazon were used to write the herb names and attach them directly to the wood. Alternatively, you could paint sections of the wood black and write or stencil the herb names in white for a bold, rustic finish.

Step 9 - ENJOY!
All that’s left is to enjoy your handmade herb planter! For added stability, you can choose to secure it to a wall—but this step is entirely optional. Sit back, relax, and watch your herbs thrive!
We'd love to see your finished Herb Planter! Make sure you tag @StoneZoneAndLandscapingSupplies in your Facebook posts so we can see!